Lens Correction Filter Tutorials
The Lens correction filter is truly amazing, being able to repair all kinds of distortions. Not only can it remedy the bulging created by a wide-angle lens, and the weird distortion created by taking a photo too close to subject – such as the bulging nose of a friend – but it can also straighten images taken at angles and make them appear as if they were shot straight on. To demonstrate, let's take an image that suffers from many problems, and correct it.
STEP 1 - Open The Filter
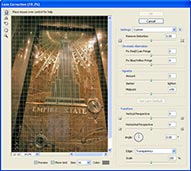
Open an affected image and choose Filter: Distort: Lens Correction. Figure 1 shows the filter's dialogue box. Notice the grid that assists us in lining things up.
STEP 1 - Open The Filter
Open an affected image and choose Filter: Distort: Lens Correction. Figure 1 shows the filter's dialogue box. Notice the grid that assists us in lining things up.
STEP 2 - Straighten The Image
The first job is to straighten the image. It's impossible to fix all the other angles if the image is not straight first.
Choose the straighten tool from the left side of the dialogue box.
Click-&-drag across the image to define the new horizon. Try to follow a horizontal line in the image if there is one.
STEP 3 - Adjust The Vertical Perspective
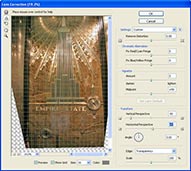
The image suffers from keystoning – it's narrower at the bottom than the top – so we'll adjusting the Vertical Perspective to make the top and bottom the same width.
Adjusting the Horizontal perspective appears to rotate the image through 3D space. What's really happening is that we're making one side narrower than the other to combat perspective problems. You can also change the Angle to counter a diagonal distortion. The Figure shows the perspective repaired.
STEP 4 - Remove The Distortion
Notice how the image appears to bulge. Move the Remove Distortion slider to the left to 'bulge out' and move to the right to 'pinch in'. This also works by choosing the Remove Distortion tool, which is the topmost tool icon on the left of the Lens Correction window. Once the tool is selected you can drag in the image, although I find that the sliders give you more control.
After adjusting the distortion, you may need to go back and again tweak the perspective. The Vertical Perspective has been readjusted to compensate.
STEP 5 - Choose An Edge Option
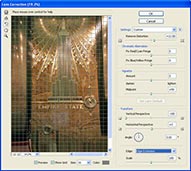
Finally, choose an edge option:
Transparency: Produces transparent pixels outside of the distorted rectangle
Background Color: Fill the empty pixels with the current background color
Edge Extension: Stretches edge pixels to fill the background (see Figure 5).
Click OK to apply.
STEP 6 - Crop The Image
To finish off the effect, crop the image to suit your needs. As you can see this really is a great tool for fixing distorted images.
by Colin Smith


Comments
Post a Comment
Please register before posting your comment here !!