Drop Shadows Tutorials
It's really easy to add a drop shadow to any object on a layer in Photoshop. Just select the layer in the Layers palette and then click on the “Add a layer style” button at the bottom of the palette and choose Drop Shadow from the drop down menu. This opens up the Layer Style dialog box and you can choose your drop shadow settings from there. Simple.
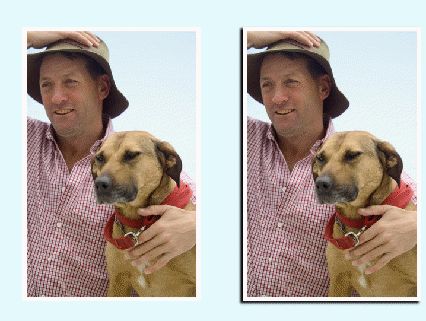
However, photographs or paper objects like this don't always lie completely flat. So to give your work a bit more ummph, you can add the illusion of a hint of a curl.
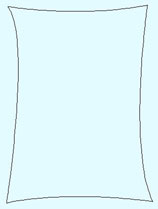
Draw a shape like the one below. You can do this using the Pen tool, Pencil tool or Brush tool, just try to keep the edges FAIRLY smooth, but they shouldn't be perfectly straight. I used the Pen tool.
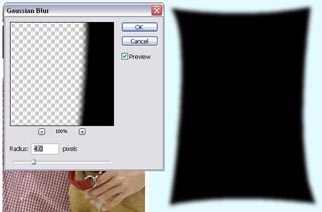
Fill in the shape with black and then blur the edge. You can blur the edge using Filter > Blur > Gaussian Blur. I used a radius setting of 4.
Drag your photograph over the curl drop shadow. (They should be on separate layers, with the photograph on the layer above the drop shadow!).
Once the photograph is placed over the drop shadow, select the drop shadow layer and Press Ctrl + T (Windows) or Cmd + T (Mac) to Free Transform. You may need to scale the curl drop shadow up or down or even skew it, depending on the effect you want to achieve. Hit Enter/Return to commit the transformation.
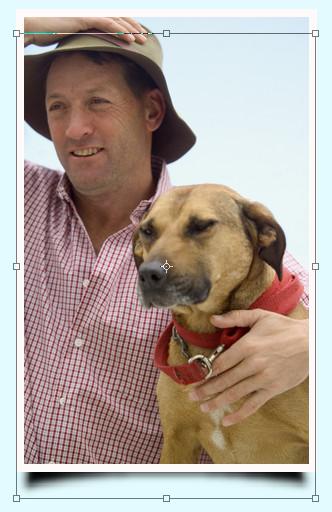
The shadow is probably going to be a bit too much so reduce down the opacity of that layer which will lighten the shadow. Voila!
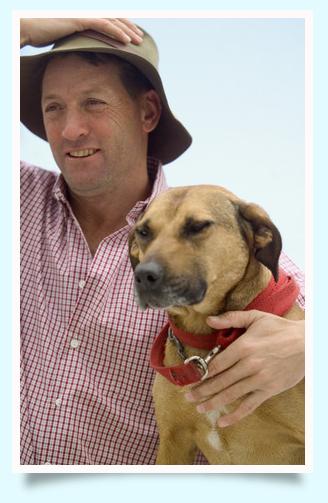
Once you've made your drop shadow you can create different effects by transforming it. For example you can lift up three corners of the photo by offsetting the drop shadow horizontally and enlarging it vertically.
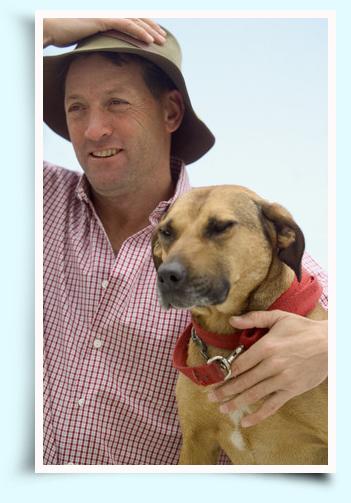
You can also give the impression of lifting the photo higher off the “page” or surface by showing a larger but softer shadow.
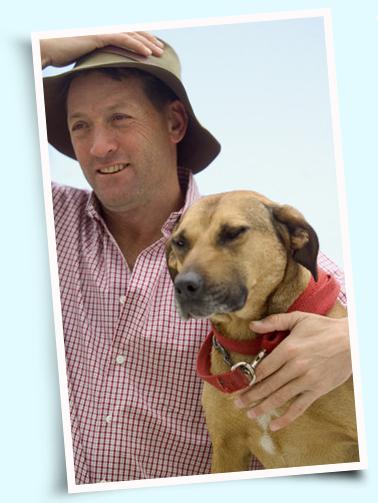
Finally, tilt the photograph and shadow together for a more natural look. Select both layers in the layers palette, then press Ctrl + T or Cmd + T. Then drag around one corner. Press Return/Enter to commit the transformation.

However, photographs or paper objects like this don't always lie completely flat. So to give your work a bit more ummph, you can add the illusion of a hint of a curl.
Draw a shape like the one below. You can do this using the Pen tool, Pencil tool or Brush tool, just try to keep the edges FAIRLY smooth, but they shouldn't be perfectly straight. I used the Pen tool.

Fill in the shape with black and then blur the edge. You can blur the edge using Filter > Blur > Gaussian Blur. I used a radius setting of 4.

Drag your photograph over the curl drop shadow. (They should be on separate layers, with the photograph on the layer above the drop shadow!).
Once the photograph is placed over the drop shadow, select the drop shadow layer and Press Ctrl + T (Windows) or Cmd + T (Mac) to Free Transform. You may need to scale the curl drop shadow up or down or even skew it, depending on the effect you want to achieve. Hit Enter/Return to commit the transformation.

The shadow is probably going to be a bit too much so reduce down the opacity of that layer which will lighten the shadow. Voila!

Once you've made your drop shadow you can create different effects by transforming it. For example you can lift up three corners of the photo by offsetting the drop shadow horizontally and enlarging it vertically.

You can also give the impression of lifting the photo higher off the “page” or surface by showing a larger but softer shadow.

Finally, tilt the photograph and shadow together for a more natural look. Select both layers in the layers palette, then press Ctrl + T or Cmd + T. Then drag around one corner. Press Return/Enter to commit the transformation.
Comments
Post a Comment
Please register before posting your comment here !!